RECIPES AND MORE FROM AN URBAN KITCHEN

Friday, April 29, 2011

Chicken Milanese


This week has been a big one. CA Creative moved into brand new offices. I've had several inspiring, amazing meetings with brands that I respect and admire. I've finally met my goal of working out five times per week. I've signed a fantastic new client. The list goes on. And as amazing as it's been, it's left me very little time to cook or blog (apologies on the extremely sporadic posts--I promise I'll be back on my regular posting schedule next week).

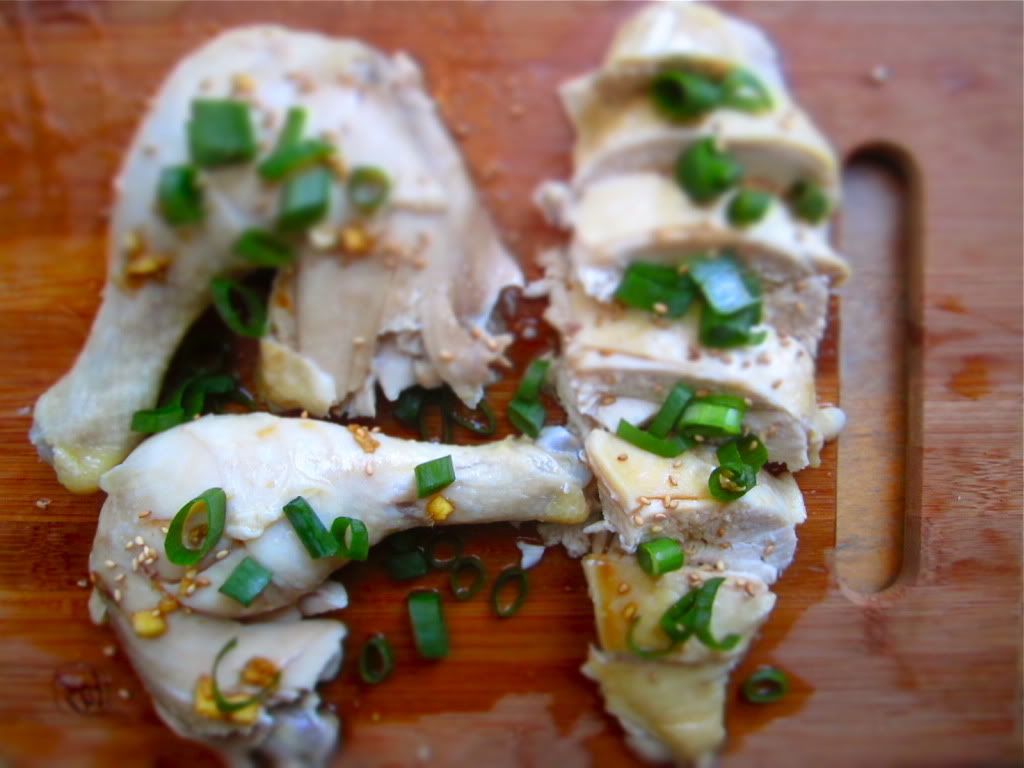
And in the midst of all this craziness, this is the recipe that has prevented me from eating fattening, unhealthy take-out. Chicken milanese. The simplest, most delicious dish you will ever make. I made this on a Tuesday night when I had a 45 minute break between work and events, and it was a serious lifesaver. Here it is, my lovelies--the ultimate busy workday meal. xo

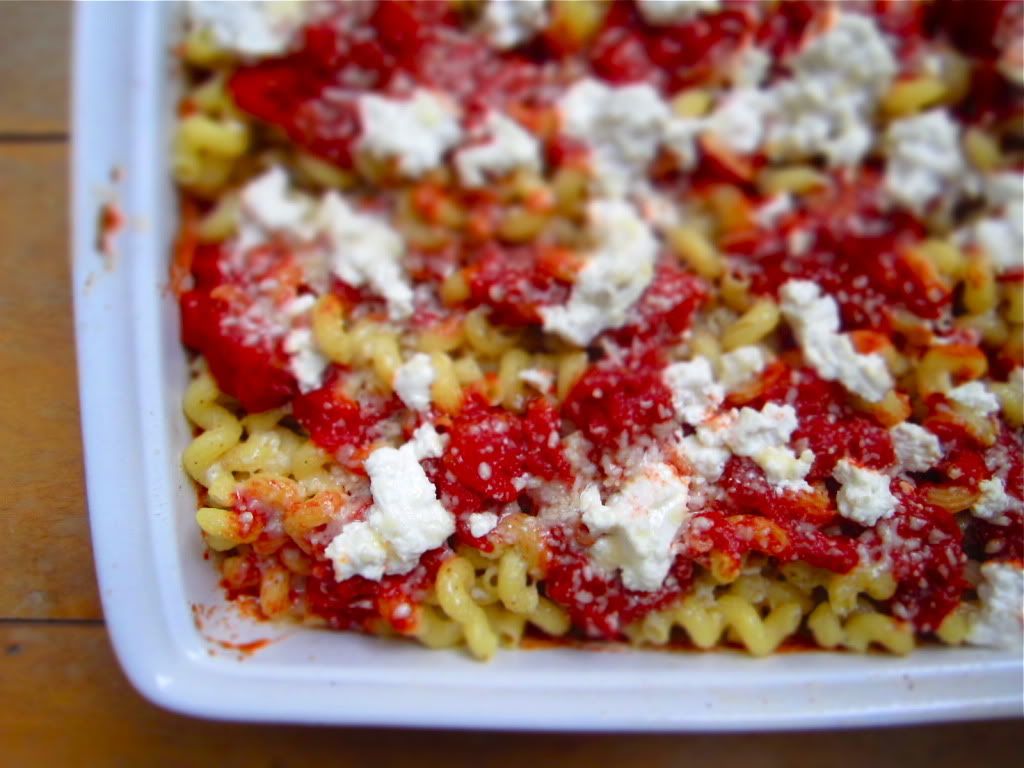
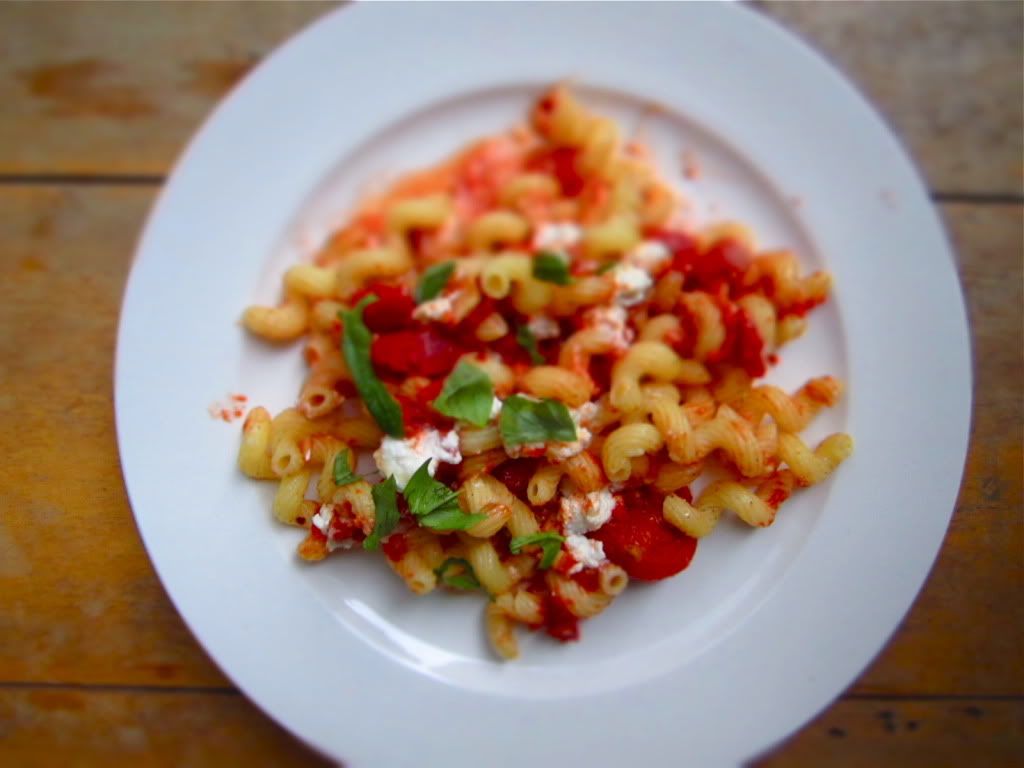
Chicken Milanese with Slow-Roasted Cherry Tomatoes and Arugula
Adapted from My Father's Daughter, by Gwyneth Paltrow
Ingredients:
For the Chicken Milanese:
4 skinless, free-range, organic boneless chicken breasts, washed and thoroughly dried
1 cup milk
2 cups Japanese panko bread crumbs
1/2 cup extra virgin olive oil

For the Tomatoes and Arugula:
2 cups cherry tomatoes
2 tablespoons extra virgin olive oil, divided
Coarse salt
2 cups wild arugula
1 tablespoon high-quality balsamic vinegar

Directions: 
For the Chicken Milanese:
Place the chicken breasts between two pieces of baking parchment paper. Using a mallet, pound the chicken breasts until they're very, very thin--you should be able to almost see through them--about 1/16-inch thick. Put the milk in a shallow bowl and the bread crumbs on a large plate. Dip each piece of chicken into the milk and then dredge it in the bread crumbs, tapping off the excess. You should have a thin, even coating.

Heat 1/4 cup of olive oil in a large nonstick skillet big enough to hold 2 pieces of chicken in a single layer. Cook for about 4 minutes on the first side, or until evenly browned and crisp. Flip and cook for an additional 2 or 3 minutes, or until the other side is browned and crisp and the chicken is firm to the touch. Wipe out the skillet and repeat with the remaining 1/4 cup of olive oil and the remaining 2 pieces of chicken.

For the Tomatoes and Arugula:
Preheat the oven to 400 degrees. Place the tomatoes in a small baking pan and drizzle with 1 tablespoon of the olive oil and a pinch of salt. Roast for 45 minutes, stirring occasionally, until they're split and blistered and super sweet.

While the chicken is cooking, toss the arugula with the remaining tablespoon of olive oil, the vinegar, and a pinch of salt. Fold the tomatoes into the arugula.

Place one piece of chicken on each of four dinner plates and mound a handful of arugula over each piece, making sure everyone gets plenty of tomatoes. Serve with a big smile.

Wednesday, April 27, 2011

White Gold


Considering the sudden 80 degree heat wave we had here in NYC today, I'm getting a bit of a head start on my Memorial Day whites. This is pretty much my summer uniform--comfy, loose white tee with sleeves rolled up, white skirt, high open toes, and sometimes a hat to shield my face from the sun. The hat, incidentally, is by Hat Attack, who is generously donating 20% of their web sales to the Skin Cancer Foundation for the month of May. Pretty good reason to add to your summer hat collection, I would say.

I'm wearing a Hat Attack hat, Charlotte Ronson tee, Theory skirt, Giuseppe Zanotti shoes, Chanel bag, assorted friendship bracelets. All pictures by Mark Iantosca. xo

Monday, April 25, 2011

Sauteed Greens with Onions and Soy Sauce


One of my favorite meals in the city comes from downtown cult favorite restaurant Lovely Day, and isn't really so much a meal as it is a couple of sides. Namely, their sauteed Chinese broccoli with ginger, garlic, and soy eaten with some plain white rice. Simple as can be, but somehow deeply satisfying and healthy to boot. I've tried to replicate the recipe a few times using various dark leafy greens like chard and broccoli rabe, but was never able to get it quite right. Until I saw this recipe in Gwyneth's cookbook last weekend. (Of course, Gwyneth would be the one to nail this one.)

I chose to make this side dish with a beautiful bunch of dark kale I found at the market and did exactly as the recipe said, sauteing it up with good olive oil, some sweet caramelized onions and a splash of soy sauce. That's it. Easy. And, dare I say, even better than the original from Lovely Day. (Nothing quite beats homemade.) Try making it yourself and eat it for dinner with a scoop of nutritious brown rice. That's what I'll be doing. I mean, let's face it, with bikini weather just about a month away, we could all use a little more of these healthy greens in our lives. xo

Sauteed Greens with Onions and Soy Sauce
From My Father's Daughter, by Gwyneth Paltrow
Ingredients:
2 tablespoons extra-virgin olive oil
1 small yellow onion, peeled and thinly sliced
1 pound seasonal greens (kale, Swiss chard, etc.), stems removed and discarded, leaves washed and roughly torn
1/2 cup water
1 1/2 tablespoons soy sauce

Directions:
Heat the olive oil in a large skillet over medium-high heat. Cook the onion, stirring occasionally for 5-7 minutes, or until just softened and a little crisp on the edges. Add about half the greens and the water--these will wilt significantly after a minute or two. Add the remaining greens and stir for another 3 minutes or until the greens are wilted but still maintain a little bite. Add the soy sauce, cook for one more minute, and serve.

Thursday, April 21, 2011

Beauty Shop: Living Proof Shampoo and Conditioner


I was first introduced to the Living Proof brand a couple of years ago at Sundance when they were launching. I remember getting my hair blown out by one of the founders of the line and marveling at how soft and silky it was afterwards. There's a crazy innovative technology behind the products that was developed by world-class scientists from leading universities--incredibly impressive. Fast forward two years and now they're selling out of Sephora like hotcakes and changing hair textures for the better around the world. Pretty amazing.

This stuff smooths my hair like no other product has ever done before, leaving it completely frizz-free even when I air dry it (which is, er, every day--laziness combined with zero time does not a good hair combo make). Plus, it smells fantastic, which we all know counts for a lot. Buy it HERE. Photo by Mark Iantosca. xo

Wednesday, April 20, 2011

Chocolate Cream Pie with Pretzel Crust


A couple of weeks ago, when I went to the Brooklyn Flea to work the Bakesale for Japan, I happened across a tiny little stand where a girl named Rachel was selling pies. She had a classic apple pie and a chocolate cream pie, and considering the unseasonably warm day, I couldn't resist a slice of the cold, silky chocolate cream. It was possibly one of the best pies I'd ever tasted. Something about the salty pretzel crust coated with a thin layer of dulce de leche with the sweet chocolate pudding and fresh whipped cream culminated into some seriously dangerous pie perfection. And so, unwilling to trek out to Brooklyn every time I needed a pie fix, I Googled away until I found the recipe. It's not difficult to make, but it's certainly time-consuming (the dulce de leche alone takes 2 hours of simmer time to complete), so save this for a lazy Sunday morning when you don't have much else to do. xo

Rachel's Chocolate Cream Pie
Ingredients:
For the pretzel crust:
1 can condensed sweetened milk
2 cups freshly broken pretzels
1 1/2 sticks melted butter
1/4 cup brown sugar

For the chocolate creme filling:
3 tablespoons sugar
3 tablespoons corn starch
3 tablespoons cocoa
2 egg yolks
2 cups whole milk
1 cup heavy cream
6 oz milk chocolate, chopped
1 1/2 teaspoons vanilla

For the whipped cream topping:
1 cup heavy cream
1 teaspoon vanilla extract
1 tablespoon sugar
Small handful of chopped almonds (optional)

Directions:
Pour the can of condensed sweetened milk into top of a double boiler and keep the water in the bottom constantly at a low boil. Add a pinch of salt, if you like the salty sweet combo.  Stir every 15 minutes for 2 hours, or until sweetened condensed milk turns brown and caramel colored.

In the meantime, bake your pie crust. Preheat your oven to 350 degrees. Mix all ingredients in a bowl, and press into pie plate. Refrigerate until set, about half an hour. Bake for 15-25 min, dependent on how thick your crust is, until lightly golden brown. Set aside to cool. Once your dulce de leche is ready, brush it on the pie crust. It will cool onto the crust and set.

While your crust is cooling, start assembling the filling. First, have an ice bath ready for cooling the creme. Have one large bowl with water and ice, with a smaller bowl set inside.  Have a strainer ready as well. Set off to the side.

Whisk sugar, corn starch, and cocoa in a pot, adding egg yolks and whisking until blended. Over medium heat, add milk and cream, whisking constantly. Keep over medium heat until bubbles start to form and mixture gets thick. Once thick, turn heat down to low and keep cooking for about 3-5 minutes, continuing to stir.

Remove from heat and add chocolate and vanilla, stir until melted. Force the pudding through the fine mesh strainer into the chilled dry bowl. Once strained, stir to cool. Cover with plastic wrap (press plastic wrap directly onto the chocolate creme surface- this will prevent a skin from forming) and refrigerate for at least 2 hours.

When ready to serve, mound milk chocolate filling into the cooled pretzel crust. Whip up some fresh cream (1 cup heavy cream, 1 teaspoon vanilla extract, 1 tablespoon sugar, all whipped together in a large bowl with an electric handheld mixer until peaks form) and pile it on top of the chocolate filling. Sprinkle some chopped almonds on top if you like.

Tuesday, April 19, 2011

Find Us a Trapdoor Find Us a Plane


It's finally looking like spring around here, and I've made a firm executive decision to lose the tights for good, no matter how debatable the warmth of 55 to 60 degrees may be. With tulips blooming everywhere and people tentatively starting to shed some layers, I think I've somehow convinced myself that it's beach weather. Really, there's not much I love more than being able to leave the house in shorts and open-toed shoes.

Speaking of, isn't it awesome how a silk button-down shirt can make almost anything look pulled together and borderline professional? Even a slouchy little pair of Chloe-spring-2011-inspired leather shorts? I'm wearing an Equipment shirt, Maje shorts, Chanel bags, All Saints shoes. All pictures by Mark Iantosca. xo

Monday, April 18, 2011

Crispy Potato and Garlic Cake


With most of my friends off to the desert for Coachella this weekend, I had a pretty legit excuse to stay in, get organized, watch movies, go for a lot of long runs, and try some new recipes. Saturday's dark clouds and nighttime lightning storms made for an especially cozy night perfect for huddling under blankets and watching Harry Potter on iTunes (which, incidentally, is a terrifying movie--kids must be braver these days).

The rain and thunder put me in the mood to eat something simple and homey and a bit decadent for dinner, so I put together this potato cake from Gwyneth Paltrow's new cookbook. It was inspired by the potatoes they serve at one of my favorite restaurants in the world, L'Ami Louis, in Paris (if you haven't been, it's more than worth making a pilgrimage for the next time you're in the City of Lights--their roast chicken is on another level). As soon as my potatoes were out of the oven, I piled them up in a big bowl and took them straight to bed, where Harry Potter and a pile of pillows was awaiting me. Pretty perfect. xo

Crispy Potato & Garlic Cake
Adapted from My Father's Daughter, by Gwyneth Paltrow
Ingredients:
2 large baking potatoes (each about 2/3 pound), peeled
1/4 cup plus 1 tablespoon duck fat (the tablespoon is for the pan, or you can use butter)
1/4 cup extra virgin olive oil
3 cloves peeled garlic, 2 crushed, 1 very finely minced
Coarse salt
1 tablespoon finely chopped fresh parsley

Directions:
Preheat the broiler.

Boil the potatoes for 20 minutes and let them cool before slicing them into 1/8-inch-thick slices. Heat a spoonful each of the duck fat and the olive oil in a large nonstick frying pan over medium heat. Add 1 of the crushed garlic cloves and as many potato slices as can fit in one layer. Cook for about 3 minutes a side, or until lightly browned. Remove to a paper-towel-lined pate and repeat with the remaining fat and potatoes, switching out the garlic cloves when they get too brown.

Coat a small (6-8-inch) cast-iron skillet with the tablespoon of duck fat. Line the bottom with a single layer of potato slices, sprinkle with salt, and add another layer. Repeat this process, pressing each layer down hard with the back of a wooden spoon and lightly salting as you go until you've layered all your potatoes. Pressing them down is what will keep the cake together, so don't be too gentle. Stick the cake under the broiler until really browned and crispy, about 5 minutes. Invert it onto a plate and scatter with the 1 clove of finely minced garlic, parsley, and bit more salt if you like. Cut into wedges and serve.


Cook's Note: I didn't have duck fat handy, and I certainly wasn't about to venture out in the rain to procure some, so I used butter instead. It worked out fine. Also, the smallest cast-iron skillet I had was 10 inches, so my potatoes didn't come out as cake-like as I would have liked, but trust me, the flavor didn't suffer a bit.

Friday, April 15, 2011

Found: Isabel Marant Shorts


These little shorts have been impossible to find. I've stopped into the Isabel Marant store in SoHo more times than I care to admit, checking in on them, seeing if a new shipment had arrived. I've stalked Net-a-Porter for weeks on end, hoping that the shorts were a part of their spring buy and waiting for them to appear in the What's New section. I've talked to the people at Curve about them, I've stared at them on Style.com. Well, today was the day. They hit Net-a-Porter this morning, and I clicked "purchase" faster than you can say "perfect pink shorts" and they are officially on their way to me as I type. They're perfect, no? Perfect shade of bubblegum pink, perfect little laces that make them look a little like boardshorts, perfect supershort length. Also, it's a good thing that my hyperspeed online shopping skills are so finely honed--they sold out within an hour. xo

Thursday, April 14, 2011

Spring Pasta


One of my most favorite birthday presents was a pasta making class at Eataly, given to me by one of my best friends (and business partner), Alex. It was quite the experience, watching experts deftly whip up the most divine fresh pastas from scratch and hearing them talk about all the prime ingredients that they use to make it all happen. The best part was that we got to eat it in the end--a whole 3-course pasta menu's worth of it, including wine pairings.

Pictured above is the fresh spinach fettucine that we made--the pasta dish that came out of it was, in my opinion, the best of the three, and perfectly easy to execute. I still don't know when I'll get up the nerve to try rolling out a batch of homemade pasta on my own, but luckily for me (and you), perfectly made fresh spinach fettucine is readily available at Italian markets everywhere. And below is the flawless recipe for what to make with it for spring. xo

Freshly made ravioli from class

The recipe they gave out to the class, covered in my hastily written notes

Spinach Fettucine with Chanterelles, Spring Peas, and Prosciutto
Recipe courtesy of Lidia Bastianich
Ingredients:
1 cup shelled fresh peas or frozen peas, defrosted and drained
Salt
1 pound fresh chanterelle mushrooms
5 tablespoons extra-virgin olive oil
3 garlic cloves, peeled
2 ounces Prosciutto di Parma, thinly sliced and chopped
Freshly ground pepper
1 1/2 pounds ripe fresh plum tomatoes, peeled, seeded, and crushed
1/4 cup fresh Italian parsley, chopped
1 pound spinach fettucine pasta
1/2 cup Parmigiano-Reggiano or Grana Padano cheese, freshly grated

Directions:
If using fresh peas, parboil them in a small saucepan of boiling salted water until softened, 3 to 5 minutes. Drain them and set aside. Trim the tough ends and wilted spots from the mushrooms. Wipe them clean with a damp paper towel or wash them quickly and dry them well. Slice them thin and set aside.

Bring 6 quarts of salted water to a boil in an 8-quart pot over high heat.

Heat the olive oil in a large skillet over medium heat. Whack the garlic cloves with the flat side of a knife and add them along with the prosciutto to the oil. Cook, stirring, until lightly browned, about 4 minutes. Stir in the mushrooms, season them lightly with salt and pepper, and cook, stirring, until they are lightly browned and wilted, about 7 minutes. Pour in the tomatoes, season them lightly with salt and pepper and bring the sauce to a boil. Lower the heat so the sauce is at a lively simmer and cook 5 minutes. Stir the peas and chopped parsley into the sauce and cook until the peas are tender, about 3 minutes.

While the sauce is simmering, stir the fettucine into the boiling water. Return to a boil, stirring frequently. Cook the pasta, semi-covered, stirring occasionally, until done, about 10 minutes.
Drain the pasta, return it to the pot and pour in about three-quarters of the sauce. Bring the sauce and pasta to a boil, tossing to coat the pasta with sauce. Check the seasoning, adding salt and pepper if necessary. Remove the pot from the heat and stir in the grated cheese. Transfer the pasta to a warm platter, top with the remaining sauce and serve immediately.

Wednesday, April 13, 2011

In the Market: Rose Gold


"Turn soft and lovely anytime you have a chance." -Jenny Holzer

I loved all the soft rose shades, nudes, creams, and clean whites that floated down various spring 2011 runways. There's not a soul in this world that those particular colors don't flatter, and there's something really alluring about how delicate and ethereal they can be.

A few of my favorite pieces:

1. Proenza Schouler printed tissue tank, $275, at lagarconne.com
2. Cacharel silk jumpsuit, $845, at lagarconne.com 
3. Cacharel high platform wedge, $635, at barneys.com  
4. Alexander Wang jade stingray bag, $795, at net-a-porter.com  
5. Jennifer Meyer wishbone earrings, $225, at barneys.com 
6. Victoria Beckham 18-karat rose-gold aviators, $775, at net-a-porter.com 
7. Topshop floral dress, $95, at topshop.com 
8. Deborah Lippmann nail lacquer in Prelude to a Kiss, $16, at lippmanncollection.com
9. Michael Kors rose-gold plated stainless steel watch, $250, at net-a-porter.com

Tuesday, April 12, 2011

Beef and Brown Rice Chili


One of my ultimate comfort foods is beef chili. When I was growing up, my mom would make big batches of it using her special, still-secret recipe, and I would gobble it up by bowl, always hankering after more, even after the leftovers were long gone. By now, I've found and developed my own favorite recipes, but I'm always game to test drive one more. 

This particular chili is one I found on the blog of one of my favorite chefs, Marcus Samuelsson of Red Rooster fame. It struck me as being completely unique in that it doesn't involve a dozen different spices and hours of simmering time. Instead, it's quick, pared down, and super healthy (hello, brown rice and kale). Don't get me wrong, nothing really beats a good, old-fashioned pot of chili, but this one will do in a weeknight pinch, especially now that tank-top-weather is officially around the corner. Recipe down below. All pictures by Mark Iantosca. xo

Beef and Brown Rice Chili
From marcussamuelsson.com
Ingredients:
Salt, for seasoning beef, and to taste
1 pound ground beef, divided into ½- to 1-inch portions
3 tablespoons canola oil
One 28-ounce can crushed tomatoes
4 cups cooked brown rice
1 bunch Lacinato Kale, cut into 1-inch pieces
Freshly ground pepper, to taste
Optional seasonings: bay leaf, coriander, cayenne

Directions:
Heat a large saute pan or pot over medium-high heat.  Season the beef generously with salt.  Add the canola oil and heat through.  Add the beef to the pan and sear it, letting the meat brown well.  Stir to caramelize all the sides of the beef. (At this point add the optional seasonings.)

Add the tomatoes and scrape the bottom of the pan with a wooden spoon.  Bring to a boil, then reduce to a simmer. Simmer until slightly thickened, about 10 minutes. Add the rice and kale and fold into the tomato and ground beef mixture. Heat through until the kale is wilted and the rice is hot.

Season with salt and freshly ground pepper and serve.

Cook's Note: I added random pinches of chili powder, red pepper flakes, and cayenne pepper and found that the spices gave it a nice added boost of flavor. 

Monday, April 11, 2011

Sake Steamed Chicken with Ginger and Scallions


When I first heard it, the idea of steaming a whole chicken seemed downright silly to me, even if the idea did come from one of my most trusted sources, Melissa Clark of The New York Times. Why would I want to eat a tasteless steamed chicken, when I can just as easily eat a golden brown, crisp-skinned, roasted one?, I thought to myself, scoffing at very notion of it. And then one day, in the middle of a busy work session, I ordered it to be delivered off of a coworkers takeout Thai menu. The steamed ginger chicken seemed like a safe bet from a place I'd never eaten at, and truth be told, I had my head buried so far in a new client proposal, that I barely glanced at the menu before making a split second decision.

I think you all probably know how this story ends. When my order came, the scent of warm ginger wafted out of my little takeout container, successfully tearing me away from my laptop for long enough to pay attention to the first, tentative bite I took. And what a bite it was. Not to glorify takeout Thai or anything, but the chicken was fall-off-the-bone tender, fragrant, and perfectly seasoned. I dug the New York Times recipe up on the Internet right then and there and vowed to try this steamed chicken business asap. And here are the delicious results. Try it for yourself and see--I'll always love roast chicken, but the bones on this bird were clean as a whistle by the time we were done with it, not a leftover in sight. xo

Sake Steamed Chicken with Ginger and Scallions
From The New York Times
Ingredients:
1 3 1/2 pound chicken, rinsed and patted dry
1 1/2 cups dry sake
Kosher salt
2 tablespoons soy sauce
2 tablespoons orange juice
2 teaspoons rice vinegar
1 1/2 teaspoons lemon juice
1 1/2 teaspoons mirin or sweet sherry
1 tablespoon chopped ginger root
1 large garlic clove, minced
3 thinly sliced scallions
2 tablespoons sesame seeds, preferably black

Directions:
Place a steamer basket in the bottom of a large stockpot. Pour in equal amounts of sake and water, enough to reach the bottom of the steamer basket. Bring to a boil.

Generously salt the chicken inside and out; set breast side up in the steamer basket. Reduce the heat to low and cover. Steam the chicken until the juices run clear when pierced with a knife, about 1 to 1 1/2 hours. Turn off the heat and allow to cool for about 20 minutes.

To prepare the sauce, in a small bowl whisk together the soy sauce, orange juice, rice vinegar, lemon juice, mirin, ginger and garlic.

Remove the chicken from the pot and place on a large cutting board; carve and set pieces on a platter. Spoon some of the sauce over the meat and sprinkle with scallions and sesame seeds. Serve extra sauce on the side for dipping.

Friday, April 8, 2011

Pasta "Timballo" with Fresh Ricotta


One place I'm dying to visit is Sicily; all the different types of cooking that vary from village to village, the lively markets, the coastline, the wineries, the fresh and simple cooking...it all sounds so perfect, doesn't it? This timballo is a classic Sicilian pasta dish that is reserved for formal occasions, but here in my tiny little kitchen in NYC, I decided that a random rainy Tuesday night was special enough to bake it up. I suggest you do the same. It's just too good to wait for.

The dish comes out of the oven piping hot with steaming heaps of warmed fresh ricotta intermixed with bright, zingy tomato sauce; it's one of the best baked pastas I've ever made (and yes, that includes my mac and cheese, which I think it's directly on par with). Invite a bunch of friends over and share it this weekend. P.S. Happy Friday. xo


Pasta "Timballo" with Fresh Ricotta
Adapted from Heart of the Artichoke and Other Kitchen Journeys, by David Tanis
Ingredients:
1 pound anelli pasta (I couldn't find anelli pasta, so I used the fun squiggly shape above)
Olive oil
Salt and pepper
Red pepper flakes
4 cups Tomato Sauce (my recipe follows)
1 pound best-quality fresh ricotta, at room temperature
Grated pecorino
A handful of basil leaves, roughly chopped 

Directions:
Bring a big pot of salted water to a boil. Preheat the oven to 350 degrees. Boil the pasta for about 1 minute less than the package instructions say; it should be firmly al dente. Drain the pasta and put it into a large bowl. Drizzle with a little fruity olive oil, and season to taste with salt, black pepper, and red pepper flakes.

Meanwhile, heat the tomato sauce. Have a large, deep ovenproof platter ready. I used a 9 x 13 glass baking dish.

Spoon about half the sauce into the platter and stir half of the ricotta into the sauce, leaving it rather lumpy. Pile the pasta on the sauce on the platter, and spoon the rest of the sauce on top of the pasta. Top with spoonfuls of the remaining ricotta and sprinkle with grated pecorino. Put the platter in the oven for about 10 minutes, to heat through completely. Sprinkle with basil, and serve more pecorino on the side.

My foolproof homemade tomato sauce I've been making forever. I found the recipe originally on Goop: In a large saucepan, slowly cook six cloves of thinly sliced garlic in a couple tablespoons of olive oil for five minutes over low heat.  Add two large, fresh basil leaves and stir for a minute.  Add two 28-ounce cans of whole, peeled tomatoes along with their juice and two more whole basil leaves.  Bring the sauce to a boil, turn down the heat, season with salt and pepper and let it bubble away on low heat for 45 minutes. Cool and refrigerate.

Thursday, April 7, 2011

Get Straight and Wait


My refusal to post anymore winter outfits on this blog continues with Isabel Marant! I've had this little checked shirt for weeks and I've been dying to break it out with little cut-off shorts, open-toed shoes and a few bright rope bracelets thrown in for good measure. Alas, the weather is STILL not cooperating and I'm starting to think that New York may or may not just skip spring altogether. These are dark days. Dark, dark days.

The Proenza-Schouler-esque bracelets above are a genius DIY project by my friends Elizabeth Monson and Mark Iantosca. I'm duly obsessed with them and will be wearing them all summer long. You can buy one yourself for a mere $30 at their Etsy store. Happy shopping.

I'm wearing an Isabel Marant shirt, Proenza Schouler belt, Siwy shorts, Julien Louie for Aldo shoes. All photos by Mark Iantosca. xo

Wednesday, April 6, 2011

Texas Chocolate Sheet Cake


Don't get me wrong, I love a fancy, pastry-chef-made dessert as much as (or probably way more than) the next girl, but I have a much stronger and more loyal affinity to down-home sweets that taste like something you ate in your mother's kitchen when you were just a kid running in from school. The nostalgia of biting into an old-fashioned banana cake, for example, or a perfectly baked fudge brownie, just makes the whole thing that much better, more comforting somehow.

This is why I love Texas sheet cake so much. It tastes like the best memories you have of chocolate birthday cakes from your grade school days, but even better, sweeter, more intense. I've baked an iteration of this cake before, but this new recipe, from The Pioneer Woman Cookbook, by Ree Drummond, really takes the cake (pun intended). I actually closed my eyes and sighed when I took my first, still-warm-from-the-oven bite. Give it a go in your own kitchen, I promise it's more than worth the (minimal) effort. xo

Texas Sheet Cake
Adapted from The Pioneer Woman Cookbook, by Ree Drummond
Ingredients:
Cake:
2 cups all-purpose flour
2 cups sugar
1/4 teaspoon salt
1/2 cup buttermilk
2 large eggs
1 teaspoon vanilla extract
1 teaspoon baking soda
2 sticks salted butter
4 heaping tablespoons cocoa powder

Icing:
1 3/4 sticks butter
4 heaping tablespoons cocoa powder
6 tablespoons whole milk
1 teaspoon vanilla extract
1 pound powdered sugar
1/2 cup finely chopped pecans

Directions:
Preheat the oven to 350 degrees.

In a large bowl, combine the flour, sugar, and salt. Stir together and set aside. In another bowl, mix the buttermilk, eggs, vanilla, and baking soda. Mix with a fork and set aside.

In a medium saucepan, melt the butter and add the cocoa. Whisk together to combine. Meanwhile, bring 1 cup of water to a boil. When the butter is melted, pour the boiling water in the pan. Allow to bubble for a moment, then turn off the heat. Pour the chocolate mixture into the flour mixture. Stir together for a moment to cool the chocolate, then pour into the egg mixture. Stir together until smooth, then pour into an ungreased jelly roll pan (or rimmed baking sheet) and bake for 20 minutes.

While the cake is baking, make the icing: Melt the butter in a saucepan over medium-low heat. Add the cocoa powder and stir until smooth. Add the milk, vanilla, and powdered sugar. Stir together. Dump in the chopped pecans and stir until well combined. Immediately after removing the cake from the oven, pour the warm icing over the top. You'll want to avoid doing much spreading, so try to distribute it evenly as you pour. Let cool for a good half hour or so until the icing is set. Slice up into squares and serve with a smile. xo

Tuesday, April 5, 2011

What I'm Wearing for Spring: Isabel Marant


Every once in awhile, a whole collection from a designer nails it for me, and I become obsessed with owning as many pieces as I can. This season, that designer is Isabel Marant. As much as I love Celine's cool minimalism and Stella McCartney's genius slashed, citrus-print silk dresses, Marant's easy surfer vibe is something I want to be in every single day. (Also, it doesn't hurt that her price points are slightly more accessible than la Celine).

I've already invested in several pieces like the little red bandanna shorts, the striped 70s linen shirt, and a checked button-down, but I'm dying to get my hot little hands on one of those cable sweaters and the lace-up pink shorts. Could anything be more perfect for another Montauk summer? xo

Monday, April 4, 2011

Nero Cookies (or Chocolate Mint Sugar Bombs)


This weekend was an exceptionally productive one. I went for three long runs, cleaned out my closets twice, sold a bunch of clothes at Beacon's Closet, and donated the rest. I made a lot of almost-final headway on a work project. I brunched with friends and took Suz Monster to the park a lot. I finished reading Three Stages of Amazement. I went out to the Brooklyn Flea. Twice. And I baked. I baked more in one shot than I ever have in my life. In fact, I was up 'til 2 AM on Friday night baking dozens and dozens of cookies for the Bakesale for Japan. And then up at 7 AM on Saturday putting the final decorative touches on my cookie packages and getting ready to head over to the Brooklyn Flea to work the sale. It was an awesome experience from beginning to end, especially knowing that 100% of the proceeds were going directly to Japan's rescue efforts. We ended up raising almost $5,000 that day, which made me positively giddy.

The cookies I chose to bake for the sale are a constant crowd favorite called Nero cookies. They're rich, chocolate-y, fudgy pieces of goodness with a direct hit of mint that reminds me of old-fashioned Girl Scout Thin Mints, but way, way better. Best of all, the recipe is one of the easiest in my cookie arsenal. It's the perfect thing to try out if you're looking for something that will make everyone happy, even if it's a crowded flea market packed to overflowing. Recipe below. xo


Nero Cookies
Ingredients: 
4 1 oz squares of unsweetened chocolate (I used Baker's)
1/2 stick unsalted butter
4 large eggs
2 cups of white sugar
2 teaspoons of vanilla extract
1 1/2 teaspoons of peppermint extract
2 cups of flour
2 teaspoons of baking powder
1/2 teaspoon of salt
1/4 cup of powdered sugar

Directions: 
Melt the butter and chocolate in a large bowl in the microwave. Heat in 30-second increments and stir in between to make sure it doesn't burn. 

Add eggs, one at a time, beating at medium speed with a handheld mixer. Slowly add the sugar, vanilla, and mint extract. Combine flour, baking powder and salt in a bowl and mix thoroughly. Slowly add the flour mixture into the chocolate mixture beating at low speed until well blended. Cover and chill in the refrigerator for 2 hours.

Preheat the oven to 300 degrees. Shape the dough into small balls then roll in powdered sugar. Place the balls on a baking sheet with parchment paper. Bake for 16-18 minutes. Remove from the oven and let cool on a rack before digging in. 

Friday, April 1, 2011

Cold Sauce (or 5-Minute Tomato Sauce)


One of my favorite things to eat in the springtime is spaghetti. There's just something about warm weather that makes me want to make pasta in all sorts of different ways, using lots of seasonal ingredients (asparagus spears with parmesan and lemon, anyone?). Unfortunately, it looks like we New Yorkers have a long time to wait 'til we're plucking juicy heirloom tomatoes warmed by the sun from farmers' market stands to make sauce with. Damn global warming and the resulting insane weather patterns. So in the meantime, here's an excellent alternative.

This is, by far, the easiest spaghetti sauce recipe I've ever come across, and it requires...wait for it...absolutely no stove time. How, you say? Here's what happens. You combine the best quality canned tomatoes you can find, mix in some fresh basil and garlic, and stick the whole thing in the fridge overnight so that the flavors have a good long time to mix and mingle. The next day, some sort of magic has happened, and you've got yourself a batch of the tastiest sauce imaginable. All that's left to do is mix in some olive oil, salt, and pepper and pour it over freshly cooked al dente spaghetti. Don't worry, the heat from the noodles will warm the sauce right up to a pleasing temperature. I will give a word of warning, however: with a dish as beautifully simple as this one, it will make a world of difference if you use the best ingredients possible. This is the time to splurge. Make it tonight, eat it tomorrow, and dream of summer. xo

Cold Sauce
Adapted from Food52.com
Ingredients:
1 28-ounce can of crushed tomatoes
1 cup fresh basil
2 cloves garlic or more
1/8 cup extra-virgin olive oil
Salt and pepper to taste
1 lb spaghetti


Directions:
Finely chop the basil. In a large bowl empty the canned tomatoes, basil, garlic, salt and pepper. Mix these ingredients together and refrigerate overnight. When you're ready to use remove from the refrigerator and add oil, stir well. In the meantime, cook the pasta al dente, drain and add the sauce. The hot pasta will warm the cold sauce. Cheese is optional.