Showing posts with label poultry. Show all posts
Showing posts with label poultry. Show all posts
Wednesday, March 14, 2012
Lemon Chicken
Today's post is dedicated to what is possibly the quickest, easiest weekday dinner I've ever whipped up (in about 35 minutes, tops). I love pan-fried chicken thighs (which, in my humble opinion, are the absolute best part of the bird), and this super simple way of cooking them makes it tempting to make these every single day. All there is to it is a quick seasoning, and about 15 minutes skin side down in a hot cast-iron pan to get the skin nice and golden and crisp. Then you flip 'em and do the same on the other side, mixing in bits of preserved lemon rind with the juice and fat in the pan, and then you serve them up to your hungry (and undoubtedly grateful) guests with big, tart wedges of fresh lemon so they can douse them in lemon juice as much or as little as they wish. It's a good way to make a friend for life. I like to eat mine with fragrant basmati rice, but if you're watching your starches, these would be great on their own with a simple green salad too. xo
Lemon Chicken Thighs
Serves 4
Ingredients:
1 tablespoon extra-virgin olive oil
8 chicken thighs
Salt and pepper
Rind from 1 preserved lemon, finely chopped,
2 lemons
Directions:
Put olive oil into a large, heavy skillet over medium heat. Season the chicken thighs with salt and pepper and add them to the skillet skin side down. Cook them like this, without moving them, until the fat has rendered out and the skin is deep golden brown and crisp, 15-20 minutes. If the skin is burning or darkening too quickly, you can adjust the heat to medium-low so the chicken browns slowly and evenly.
Turn the thighs over and stir the chopped preserved lemon rind into the fat in the skillet. Continue cooking the thighs until the meat closest to the bone is cooked through, about 15 minutes more. Serve the thighs and lemony pan drippings with fat lemon wedges.
Wednesday, February 29, 2012
Tahchin
I've lately discovered a new fascination with Iranian food. It started with a long weekend spent reading the latest issue of Saveur cover-to-cover, which included a pages-long article about Iranian home cooking, complete with delicious-sounding recipes. Over coffee with a client that same evening, I brought up my newfound desire to make Khorescht, a chicken stew with pomegranate molasses that featured heavily in the article, and she revealed that her Iranian mother had a treasure-trove of home recipes that she could procure for me. It took all my reserve to keep from leaping up and screaming, "YES!" These are the things that excite me--real home recipes made by real home cooks. Especially if they have some sort of exotic, ethnic bent. It's just more interesting that way.
One of the recipes that said client had her mother write out for me that week was for a wonderfully simple yogurt and saffron rice dish called Tahchin. It incorporates just a few ingredients and involves layering the ingredients "like lasagna." Sounded fun to me. I planned ahead a bit, since the recipe called for a roasted chicken breast, skin removed, and decided that we'd have a berbere-spiced roast chicken one night, and then use the leftovers to make the tahchin for the following night. It worked beautifully. The berbere roast chicken is, quite possibly, my new favorite way to roast a bird, and this tahchin was absolutely delicious. I lifted the lid off the cast-iron pot when the requisite cooking time had gone by to be greeted with a fragrant waft of spice and the sight of white rice studded with brilliant yellow and red bits courtesy of the generous amount of saffron that goes into this. I love saffron. Have I mentioned that? Love it. When mixed all together, this concoction is positively heady--a bit tangy from the thick Greek yogurt with an amazing texture due to the crisp layer of browned rice lining the bottom of the pot. Add the chunks of roast chicken, and you've got perfection in a pot. It'll make it into my regular(ish) rotation, for sure. xo
Tahchin
Serves 4, generously
Ingredients:
3 cups basmati rice
2 cups of plain Greek-style yogurt
1 teaspoon saffron, crumbled
3 cups roast chicken meat, shredded into bite-size chunks, skin removed
1 teaspoon fine sea salt
1/2 teaspoon freshly ground black pepper
1 tablespoon canola oil
Directions:
Bring a medium pot of salted water to boil. Cook the rice in the water for 8 minutes. Drain the rice and rinse with cold water.
In a large bowl, mix the yogurt, saffron, shredded chicken, salt and pepper.
Cover the bottom of a cast-iron pot or Dutch oven with the oil. Place 1/3 of the rice into the pot and smooth over into a neat layer. Place 1/3 of the yogurt mixture on top of the rice. Continue layering as such until all the ingredients are used up.
Cover the pot and simmer on medium-low heat for one hour. At this point, you may place a large plate over the opening of the pot and invert the tahchin so that it comes out in one piece with the crispy layer of rice on top. I preferred to save myself any potential mess and simply mixed it all up in the pot, making sure that the crispy bits were evenly distributed. Serve hot.
Tuesday, January 3, 2012
Marlow & Sons Brick Chicken
I thought I'd start off the new year with a recipe for a dish that's been one of my favorite restaurant meals for years. I've been meaning to make this thing for what seems like ages now, but never got around to it, mainly because of the need for two cast-iron pans, and then, once that was resolved, the fact that I was always a little nervous to ask the Whole Foods butchers to debone a chicken. Whole Foods is fantastic in so many ways, but for some reason, I always felt that I had to go to a classic, old butcher shop for this--one where wizened old men in blood-splattered aprons spent their days hacking apart whole animals with deadly-sharp, silver cleavers.
Well, I ran out of excuses last week once I stepped foot into Marlow & Daughters, the butcher shop owned by the same proprietors of Marlow & Sons, where the recipe for this delicious brick chicken dish originated. When I asked the guy behind the counter to halve the chicken and remove the backbone, ribcage, and thigh bones, he didn't even blink, expertly performing the surgery within minutes. I left with a plastic bag full of chicken and high hopes of finally being able to get my brick chicken fix without entering a different borough. I was not let down. Not only is this recipe almost ludicrously simple, it really works--something about the weight on top of the flattened chicken halves produces a particularly crisp skin and extra-juicy meat. It's almost like fried, without all the unhealthy side effects.
I served mine with some chopped Swiss chard tossed with equal parts sherry vinegar and extra-virgin olive oil and laid right on top of the pan juices, but any sturdy green will do, including kale or mustard greens. My advice would be to make this immediately, old butcher shop or no old butcher shop. In retrospect, it was a silly reason for not attempting this sooner--especially considering all the quality brick-chicken-time wasted. Don't make the same mistake. xo
Marlow & Sons Brick Chicken
Ingredients:
1 3–4 lb chicken, halved, backbone, ribcage, and thighbones removed
Kosher salt and freshly ground black pepper, to taste
2 tablespoon canola oil
1/3 cup chicken broth
1 tablespoon lemon juice
Directions:
Season chicken generously with salt and pepper. Heat oil in a 10" skillet over high heat. When oil begins to smoke, add the 2 chicken halves to skillet skin side down. Place another 10" skillet, right side up, on top of chicken and gently place a heavy brick or several soup cans in it (weight should be at least 20 pounds).
Reduce heat to medium-high and cook chicken until the skin is golden brown and crisp, about 18 minutes. Remove the top skillet and weight, flip the chicken halves with tongs, and pour off excess fat.
Add the chicken broth and lemon juice and cook until an instant-read thermometer inserted into the chicken's thigh registers 160°, about 3 more minutes. Serve chicken with pan sauce.
Friday, December 23, 2011
Roasted Chicken Wings
If you're trying to feed a crowd without breaking a sweat, chicken wings are one of the hands-down, easiest ways to do so. You can go to the supermarket, buy them by the bagful for a pittance, marinate them in a simple combination of Dijon, lemon juice, oil, and tarragon for as long as it takes to heat your oven, throw them in and forget about them (albeit with a timer on). And your reward for such ease? A serving platter full of meaty, sticky wings with papery crisp skin and just the right amount of spicy, lemony kick. It's a slightly more sophisticated take on Buffalo wings, and one that everyone will love. Talk about a holiday crowd pleaser. xo
Roasted Chicken Wings
From Canal House Cooking, Volume No. 6, by Melissa Hamilton and Christopher Hirsheimer
Ingredients:
4 pounds (about 20) chicken wings, tips trimmed
Juice of 2 lemons
1/4 cup extra virgin olive oil
2 tablespoons Dijon mustard
2 teaspoons tarragon leaves, dried or fresh
Salt and pepper
Directions:
Put the chicken wings, lemon juice, olive oil, mustard, tarragon, and salt and pepper to taste into a large bowl and rub the wings all over with the marinade. The wings can marinate at room temperature while the oven preheats, but if you want to marinate them longer (overnight is fine), cover the bowl with plastic wrap and refrigerate.
Preheat the oven to 375 degrees. Spread the wings out on a roasting pan in a single layer, skin side up, drizzling any of the remaining marinade over them. Roast the wings until they are well browned and the skin papery crisp, about 1 hour. The pan juices and marinade will have caramelized and some of the wings will need to be pried off the pan. Eat wings hot or at room temperature with your fingers.
Monday, November 28, 2011
Roast Duck with Potatoes for Shopbop
As far as birds go, duck may just be my favorite kind to cook. It's a bit easier than chicken since the meat has a tendency to stay super flavorful and moist, even if you leave it in the oven for a few minutes longer than you meant to. Unlike chicken, which can dry out really quickly, duck is a bit less temperamental, and the duck fat that comes along with it is pretty unbeatable for roasting potatoes with. This recipe lets you do both at the same time. The delicious fats slowly drip from the bird as you roast it, coating the potatoes, and making them crisp on the outside and wonderfully creamy on the inside. I also appreciate this particular preparation for it's utter simplicity. It reminds me of something you would find being made at a farmhouse in the country.
When one of my favorite retailers, Shopbop, asked me for a favorite holiday recipe, I immediately thought of duck and spent a supremely enjoyable afternoon roasting and writing the recipe. You can find it on their blog HERE and below. xo
Roast Duck with Potatoes
Serve 4, generously
Ingredients:
One 5-6 lb organic duck
1 small onion, peeled and quartered
1 tablespoon extra virgin olive oil
Kosher salt
Freshly ground black pepper
8 medium potatoes, peeled
Directions:
Preheat the oven to 400 degrees. Rinse the duck, pat it dry very thoroughly with paper towels, and trim off any excess neck skin. Carefully prick the skin all over about 50 times, taking care not to prick the meat underneath. This is to ensure that your duck renders all it's fat properly, giving you a perfectly crisp skin at the end. Rub the olive oil all over the duck, then season the bird inside and out with salt. Add a few grindings of pepper. Place the onion quarters in the cavity of the bird. Tie the legs together with kitchen string.
Put the duck in a large roasting pan or large cast iron skillet breast side up. Add 1/2 cup of water to the pan and roast the duck for 30 minutes. Remove the pan from the oven and add the potatoes, nestling them snugly around the bird.
Reduce the oven temperature to 375 degrees. Return the roasting pan with the duck and potatoes to the oven. Turn the potatoes every 10 minutes or so. Roast for another 40-55 minutes, until the duck skin is crisp all over and the potatoes are deep golden brown. Duck temperature should read 165 degrees on an instant-read meat thermometer. Transfer duck and potatoes to a platter and season with salt.
Tuesday, November 22, 2011
Deviled Chicken Drumsticks
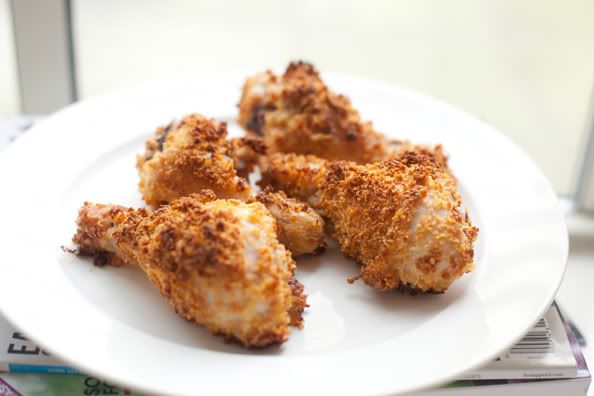
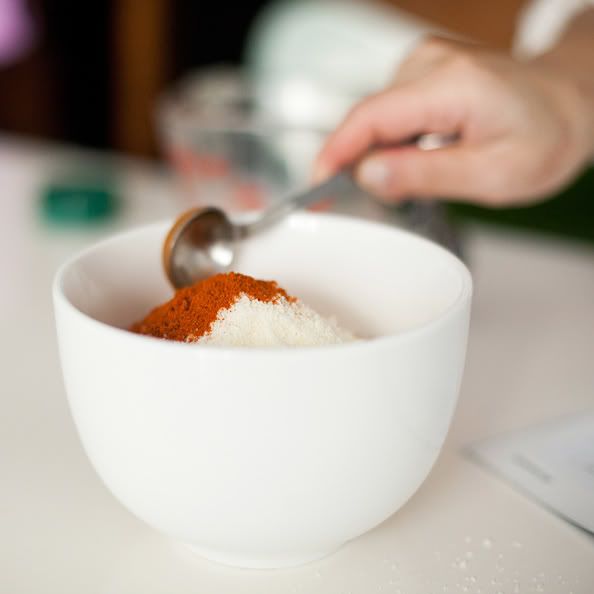
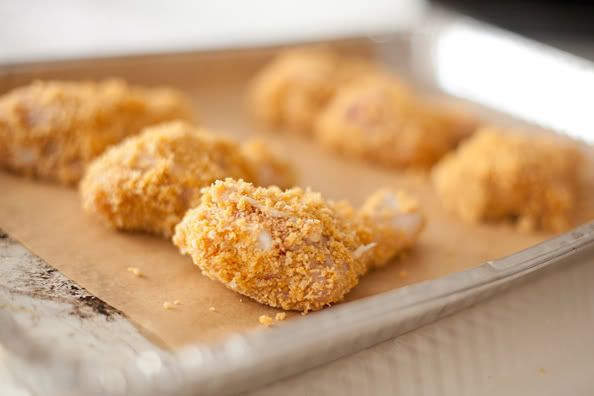
I'm always looking for new ways to make chicken drumsticks--they're my favorite part of the bird, along with the thighs. When it comes to the white meat vs. dark meat debate, I'm firmly in the camp of the latter--the meat is clearly juicier, more tender, and all-around tastier, and I'm constantly up for a new recipe that incorporates it exclusively. These easy, oven-fried drumsticks are quick as lightning to make--dredged in a delicious, shaggy mixture of grated cheese, mustard, Panko breadcrumbs, and cayenne pepper and then tossed into a hot oven to crisp. You get the fried effect without all that splashing, scalding oil, which is good by me. Recipe down below. All photos by Mark Iantosca. xo
Deviled Chicken Drumsticks
From Gourmet magazine, August 2008
Ingredients:
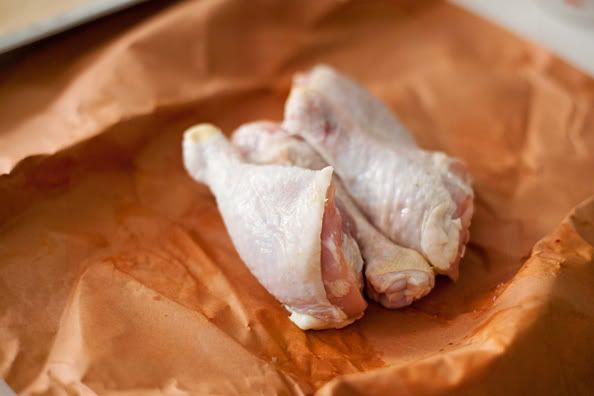
12 chicken drumsticks (2 1/2 to 3 lb total)
1/2 cup Dijon mustard
3/4 cup Panko breadcrumbs
3/4 cup grated Parmigiano-Reggiano
3/4 teaspoon cayenne
3 tablespoons unsalted butter, melted
Directions:
Preheat oven to 450°F with rack in upper third. Pat chicken dry, then toss with mustard until evenly coated. Stir together panko, cheese, cayenne, and 1/2 tsp each of salt and pepper. Drizzle with butter and toss.
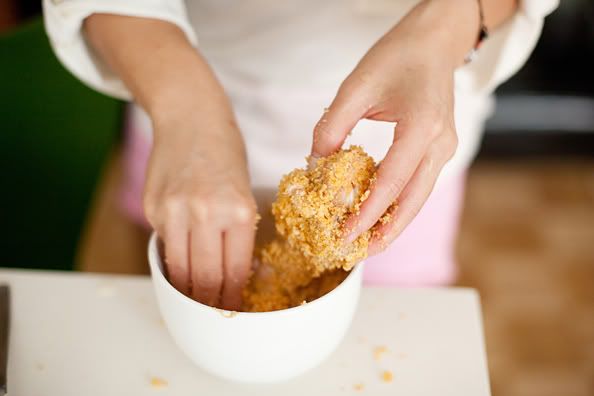
Dredge each drumstick in crumb mixture to coat, then arrange, without crowding, in a buttered large 4-sided sheet pan. Roast until chicken is browned and cooked through, about 30 minutes. Serve warm or at room temperature.
Wednesday, November 2, 2011
Braised Moroccan Chicken with Lemon and Olives
Yet another chicken stew recipe for you! Are you guys excited? Well, you should be. Because, even though I've probably made just about every single type of stewed/braised chicken under the sun, this still stands out as being an especially good iteration. The chicken is browned until crisp in a large skillet or Dutch oven, and then smothered in a fragrant, heady mixture of spices, and finally simmered in stock until it's falling-off-the-bone tender. The last-minute addition of a handful of olives and preserved lemon rinds adds an extra zing of taste that really makes this dish sing.
I lifted the recipe out of my brand new copy of the newly released Food52 cookbook, which I spent most of the weekend reading from cover to cover. I couldn't really tear myself away. It's filled with the winning recipes from the best home cooks in their robust online community, complete with mini bios, notes from the rest of the community, and recipe prefaces from Amanda Hesser and Merrill Stubbs, the founders of the site. Really, it's a fantastic concept, and I'm only jealous I didn't think of it first (or have Hesser's star power to drive it home, for that matter). In any case, I highly recommend it! It's a perfect hostess gift for those Thanksgiving dinners or, for you early holiday-shoppers, for the cook on your gift list. xo
Braised Moroccan Chicken with Lemon and Olives
From The Food52 Cookbook, by Amanda Hesser and Merrill Stubbs
Ingredients:
4 tablespoons canola oil
2.5 pounds chicken legs and thighs
Kosher salt
Black pepper
1 1/2 cup small diced onion
1 teaspoon minced ginger
1 teaspoon minced garlic
1 tablespoon ground coriander
1 tablespoon ground cumin
1 1/2 teaspoon paprika
1/2 teaspoon turmeric
1/2 teaspoon cayenne pepper
2-3 cups chicken stock
1/4 teaspoon saffron
1/2 cup green olives, rinsed
2 preserved lemons, pulp removed; rind cut into strips
2 tablespoons chopped cilantro
Directions:
Heat 2 tablespoons of oil in a Dutch oven or large, deep skillet or over medium high heat. Dry the chicken pieces and season them with salt and pepper. Place them in the skillet in batches and brown on all sides. Remove the chicken and place on a plate.
Add the onion to the skillet and cook until slightly softened. Add the ginger, garlic, coriander, cumin, paprika, turmeric and cayenne pepper and stir together. Add the chicken pieces and stir to coat with the spice mixture. Pour the chicken stock into the skillet so that 2/3 of the chicken is submerged. Add the saffron and stir to combine. Bring liquid to a simmer, cover the skillet and simmer on medium low heat 20-25 minutes. Add the olives and preserved lemons. Cover and cook another 10 minutes or until chicken is cooked through. Remove the chicken and turn the heat to high. Cook for another 6-8 minutes until sauce reduces slightly. Stir in the cilantro. Adjust seasoning to taste.
Serve chicken on a bed of couscous. Spoon sauce over the top. Garnish with cilantro.
Thursday, October 13, 2011
French Chicken in a Pot (or Poulet au Pot)
Anyone who's been reading this blog for awhile knows about my roast chicken obsession. There are few things more satisfying to me than buying a whole (organic) bird, rubbing it in oil or butter or whatever the mood calls for, and sliding it into the oven to roast. Is there anything cozier or more comforting than a quiet night at home with the mouthwatering smells of a good roast wafting out of the oven? I love the tender meat, the delicious pan juices that make for an excellent gravy with no more effort than giving it a good whisk, and most of all, I love that nutty brown, perfectly crisp skin you get when you do it right.
That's why I was a bit skeptical of this recipe when I first read through it on my handy Cook's Illustrated iPhone app. They claimed generous rewards of intensely juicy meat (yes, even on the breast), but also warned that in exchange, I would have to forgo that glorious shattering crispness of the skin that I get with my traditional roasts. But who can resist a recipe with a name as charming as "French Chicken in a Pot?" Also, I've seen Poulet au Pot on French menus for years now on every trip I take to Paris, and having never ordered it, I was curious. And they were right--the meat was undeniably tender and juicy, and the pan juices were so robust in flavor that all they needed was a squeeze of lemon in the end. I don't think anything will ever replace my beloved roasts, but this is definitely a dish worth making. xo
French Chicken in a Pot
Adapted from Cook's Illustrated
Ingredients:
1 (4 1/2-5 lb) whole organic chicken, giblets removed and discarded, wings tucked under back
2 teaspoons kosher salt
1/4 teaspoon ground black pepper
1 tablespoon extra-virgin olive oil
1 small onion, chopped medium (about 1/2 cup)
1 small celery rib, chopped medium (about 1/4 cup)
6 medium garlic cloves, peeled, trimmed, and sliced in half
1 bay leaf
1 teaspoon fresh lemon juice
Directions:
Adjust oven rack to lowest position and heat oven to 250 degrees. Pat chicken dry with paper towels and season with salt and pepper.
Heat oil in large (5- to 8-quart) Dutch oven over medium heat until just smoking. Add chicken breast-side down; scatter onion, celery, garlic, and bay leaf around chicken. Cook until breast is lightly browned, about 5 minutes. Using a wooden spoon inserted into cavity of bird, flip chicken breast-side up and cook until chicken and vegetables are well browned, 6 to 8 minutes.
Transfer chicken to carving board, tent with foil, and rest 20 minutes. Meanwhile, strain chicken juices from pot through fine-mesh strainer into a bowl, pressing on solids to extract liquid; discard solids (you should have about 3/4 cup juices). Allow liquid to settle 5 minutes, then pour into saucepan and set over low heat.
Carve chicken, adding any accumulated juices to saucepan. Stir lemon juice into jus to taste. Serve chicken, passing jus at table.
*The cooking times in the recipe are for a 4 1/2- 5 lb bird. A 3 1/2 - 4 lb chicken will take about an hour to cook, and a 5- 6 lb bird will take close to 2 hours.
Friday, September 2, 2011
Buttermilk Fried Chicken
Fried chicken....just saying the words aloud make me want to bite into a crisp, juicy drumstick, preferably on a big, wide expanse of jewel green lawn in the sunshine. Whenever I'm planning a summer picnic, fried chicken is the first thing that goes on my must-make list. It's delicious fresh out of the fryer, but has it's own charms served cold or at room temperature, out of a plastic container en plein air. But let's be real. When is fried chicken ever bad? It's a hard thing to mess up.
That said, not every fried chicken recipe is created equal. This one, from Andrea Reusing's beautiful cookbook, Cooking in the Moment, is one of the best ones I've tried. The chicken is drowned in buttermilk overnight so that the meat tightens up and retains it's juices, and then fried in a traditional mixture of flour, salt, and pepper until crisp golden brown. Yum. One caveat: be careful when placing the chicken into your oil--it will splatter and burn you something awful if you're not. Believe me, I know. xo
P.S. I served my chicken with a perfect side of green beans. Recipe HERE.
Fried Chicken
From Cooking in the Moment, by Andrea Reusing
Ingredients:
1 3½-4 lb. chicken, rinsed, dried, trimmed, and cut into ten pieces
2 cups buttermilk
2 tablespoons kosher salt
2 cups all-purpose flour
1 1/2 teaspoons freshly ground black pepper
Lard or expeller-pressed vegetable oil for frying
Directions:
Put the chicken, buttermilk, and 1 tbsp. salt into a large bowl. Stir well and refrigerate overnight.
In a colander, drain chicken and let it come to room temperature. In a large bowl, mix together flour, remaining salt, and pepper.
Fill two large cast-iron skillets (or other deep, heavy saute pans) with lard (or oil) about 1 inch deep. Heat over medium high to 325°. Starting with the dark meat, lightly coat one piece of chicken at a time in flour mixture, brushing off excess flour. (Avoid pressing the flour into the chicken.) Gently lay floured chicken in oil. Don’t move it at all for the first few minutes, so it doesn’t stick.
Repeat with the remaining dark meat, then move on to the white, ideally cooking the two in separate pans. Once a pan is about three-quarters full, reduce heat to low and partially cover.
Watch chicken closely, turning the pieces with tongs as needed for even cooking and rotating the pan itself on the burner. As the first side turns deep golden brown (8-10 minutes), turn the pieces over and continue to cook until the they are evenly crispy (another 8-10 minutes). The dark meat will take a little longer than the white.
Transfer the chicken to a clean brown paper bag to drain. Serve warm or at room temperature.
Friday, August 26, 2011
Turkey Chili
In Honolulu, where I grew up, there's a chain of restaurants called Zippy's that my friends and I frequented quite often. High-brow it wasn't, but it was a few notches above fast food and a lot of them were open 24/7, which came in handy for those late night meals to soak up the alcohol you weren't supposed to be drinking (sorry, mom!). They were known around the island for having the best beef chili served with a side of sticky white rice, which was my order of choice. It was so popular that they started shipping it everywhere in frozen packets, mainly, I suspect, for all the college students that had landed in the "mainland" and missed their chili fix like I did.
Even to this day, chili is one of my favorite comfort foods, and this recipe for a healthier version, made with turkey, is one of the best I've made. It comes from Alice's Tea Cup, a charming restaurant in Manhattan and is said to have a "cult following" among their clientele. Make a big batch of it this weekend--it's perfect hurricane food. The leftovers will taste even better after a day or two. xo
Turkey Chili
Adapted from Alice's Tea Cup
Ingredients:
4 tablespoons unsalted butter
3 pounds ground turkey
Kosher salt and freshly ground black pepper
1 cup finely chopped carrots (about 2 medium carrots)
1/2 cup finely chopped red onion (about 1 small onion)
1/2 cup finely chopped celery (about 1 large stalk celery)
2 large garlic cloves, minced
4 cups unseasoned tomato sauce (I used organic Muir Glen brand)
1 1/2 cups diced tomatoes (from one 14-ounce can)
1 15.5-ounce can black beans
1 15.5-ounce can navy beans
1 15.5-ounce can kidney beans
2 1/2 teaspoons chili powder
1 1/2 teaspoon ground cumin
Directions:
Melt 2 tablespoons of the butter in a large skillet over medium heat. Add the ground turkey and saute until it is lightly browned but not burned, about 5-7 minutes. Add salt and pepper to taste, and set the turkey aside.
Melt the remaining 2 tablespoons butter in a large soup pot or Dutch oven, and saute the carrots, onions, celery, and garlic until softened, about 8-10 minutes (be careful not to burn them).
Add the tomato sauce and chopped tomatoes, bring to a simmer, and cook for 10 minutes. Add all the beans to the pot and simmer for another 10 minutes. Add the turkey and cook for 20 minutes. Add the chili powder, cumin, and salt and pepper to taste, and simmer for another 10 minutes. Serve hot.
Subscribe to:
Posts (Atom)


